|
|
|
|
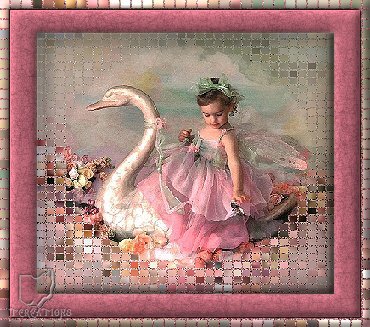
Mosaic Pillow Frame
This tutorial was created April 13, 2002 ©TCreations Property Of TCreations
This creation is my own. Anything similar is purely coincidental. Please do not copy any part of this tutorial or place it anywhere without express written permission from me. You may link to this tutorial ONLY. Do not sent it through e-mail! If you would like to use any of my tutorials for group settings or group lessons, please E-Mail me for my conditions. This tutorial was written using JASC PSP version 7.04 and assumes you have a working knowledge of the program at an intermediate level.
Let's get started! Tools needed for this tutorial are as follows.
JASC PSP 7.04.
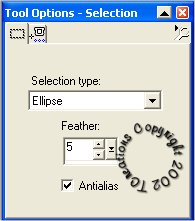
You can download a trial version here. Step 1. Open your graphic in PSP. Make 2 duplicates of your image. Close the original. The reason for this is if I want to use the same graphic for another tutorial, I would be able to. On one of your duplicated images, make sure you resize it to 350 pixels on the longest side. Go to image> sharpen> sharpen. You can minimize the other, we'll be using it later. Step 2. Activate the image you resized and go to layers> promote to layer. Step 3. Grab your selection tool using these settings.
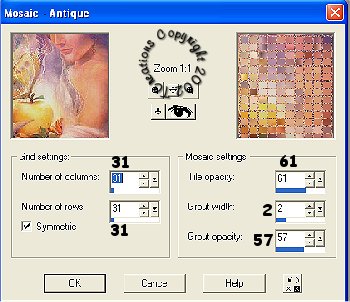
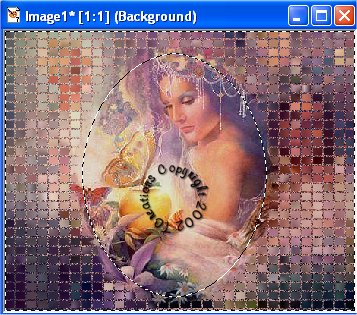
Step 4. Select a portion of your graphic in the center that you want for the focal point. Make sure you do not go clear to the edges. Remember, the selection will go out further than your actual selection because we have feathered by 5. Go to selections> invert. Step 5. Go to effects> texture effects> mosaic antique and apply using these settings.
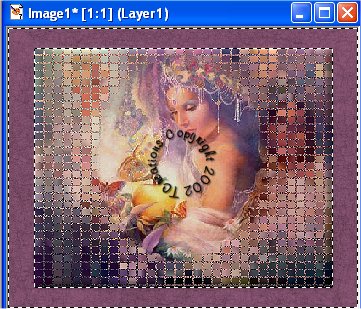
This is what it should look like now. Deselect.
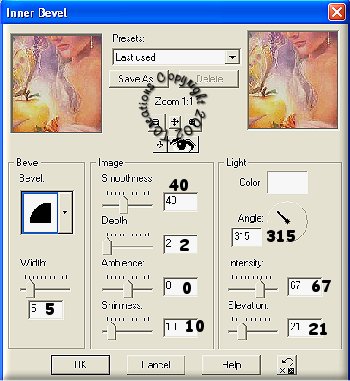
Step 6. Now we are going to add an inner bevel with these settings.
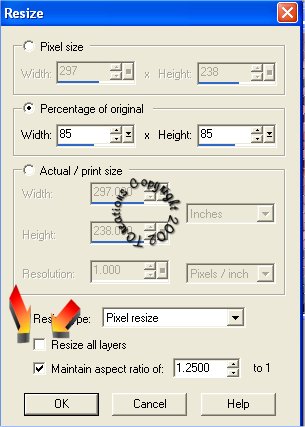
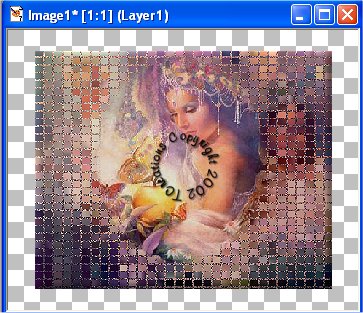
Step 7. Now we are going to resize our image, but not the canvas it sits on. Go to image> resize and use these settings, making sure "resize all layers" is UNCHECKED! Now sharpen your image by going to image< sharpen> sharpen.
This is what it should look like now.
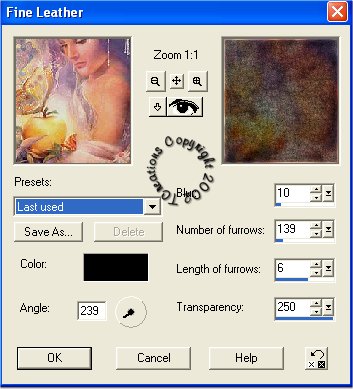
Step 8. Using your magic wand, select your border. Using a complimentary color from your graphic, flood fill your border selection. Go to effects> texture effects> fine leather and apply these settings.
This is what we should have now.
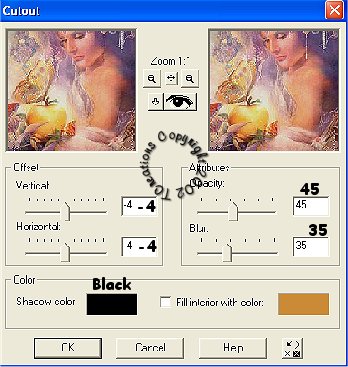
Step 9. Apply an inner bevel using the same settings as before. Step 10. Go to selections> invert, then to selections> float. Apply a cutout using these settings.
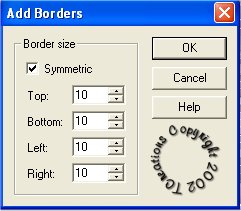
Apply the cutout again, this time changing the Horizontal & Vertical to 4. Deselect. Step 11. Make sure your background is set to white. Go to Image> add borders with these settings.
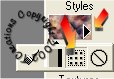
Step 11. With your magic wand, select your border. Change your foreground to "Pattern", and find the duplicated image we minimized at the beginning.
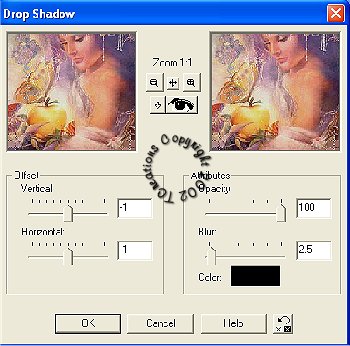
Apply these settings and click ok. Step 12. Flood fill your border with your pattern. While still selected, apply the same mosaic antique as before. (effects> texture effects> mosaic antique). Step 13. Apply the same inner bevel as before. Go to selections> invert. Apply a drop shadow using these settings.
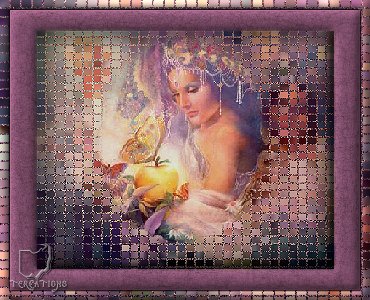
Apply the drop shadow again changing the Vertical & Horizontal to 1. Deselect. You're Done! Here is another I did.
© Denton Lund All Rights Reserved The image I used above for this version of my Mosaic Pillow Frame is by Denton Lund. He has graciously given me permission to use his artwork. I stumbled upon his website and was blown away by the amazing beauty of his paintings. Click HERE to visit his site. I hope you have enjoyed this tutorial. If you have any questions, feel free to E-mail me anytime.
These tutorials and their contents are property of TCreations and are copyrighted by law. Do not place any part of these tutorials anywhere without my permission. You may link to them ONLY. Do not remove any of the graphics, zip files or HTML within these pages to reproduce these tutorials, without my express written permission. DO NOT send any portion of this tutorial through E-mail. The Image you create from this tutorial is yours to do with what you want. If you would like to use any of my tutorials for group settings or group lessons, please E-Mail me for my conditions. ©TCreations 2001 All Rights Reserved. Thank you to my testers, Patti, Jenn, Tish and Barbara! You guys are great! The backgrounds on this site were created by me exclusively for TCreations and may not be used without my permission. Property of TCreations
|